Guided Walkthroughs
Step-by-step recipes for the most common tasks. Each lists the minimum role needed; if you have a higher role you can do everything a lower one can.
Onboard your first application portfolio
Editor roleThe fastest way to get a usable catalog is to bulk-load applications from a spreadsheet, then layer in structure. Start here if Eidon is empty.
- Go to Tools → Bulk Import and download the "Applications" CSV template.
- Fill in one row per application — at minimum a name; optionally lifecycle_status, vendor, annual_cost, business_criticality and a domain_name to auto-link it to a domain.
- Back in Bulk Import, choose the Applications entity type, upload your CSV, and review the preview (rows that duplicate an existing name are skipped).
- Confirm the import, then open Architecture Catalog → Applications to see the loaded records.
- Create your Domains and Portfolios (Architecture Catalog) and assign applications to them, either inline on each application or via Bulk Edit on the Applications list.
- Fill in the TIME ratings (business impact, technical condition, future business value) on key applications so the EA Analysis and Cost/Value reports light up.
Run a TIME portfolio analysis
Editor roleTIME (Tolerate / Invest / Migrate / Eliminate) classifies each application from its Technical Condition and Future Business Value — a standard rationalisation framework.
- On each application you want to analyse, set Technical Condition and Future Business Value (and Business Impact) ratings on its detail page.
- Open Analysis → EA Analysis. Applications are plotted into the four TIME quadrants automatically.
- Use the quadrant view to spot Eliminate candidates (low value, poor condition) and Invest candidates (high value, good condition).
- For deeper cost context, cross-reference Reports → Cost & TCO, which buckets applications into cost/value quadrants using the same ratings plus spend.
- Open Analysis → Rationalization to turn a classification into an actual tracked decision (disposition, rationale, owner, target date) and, once executed, record realised savings.
Design and get a solution architecture approved
Editor roleSolution Architecture turns a piece of demand into a concrete, governed design before anything gets built — requirements, options, a weighted decision, and the components that realise it.
- Go to Solution Architecture → Solution Designs and click "+ New Solution Design".
- Fill in the summary, business context/drivers, current state and target state, then capture Requirements & NFRs (functional and non-functional) as you elicit them.
- Add candidate Options, then use the Decision Matrix to score each option against weighted criteria (e.g. cost, scalability, risk) — the weighted total ranks them objectively rather than by gut feel.
- Add Building Blocks for the logical components of the solution, optionally linking each one to the catalog object (application, technology, data asset) that realises it, and trace requirements to the block that satisfies them.
- Use the Reuse panel to pull in existing Architecture Patterns and Reference Library entries instead of designing from scratch, and link any Risks the solution carries.
- Request a review or route the design through an approval chain; once approved, schedule a Recertification so it doesn't silently go stale, and export it for the record — Export .md for a plain-text copy, or Export PDF for a formatted report with a branded cover, KPI strip, colour-coded requirement/risk tables and a weighted-score options chart.
Provision and later retire an Architectural Service
Editor roleService Architecture catalogs the technical/SOA services running the estate — distinct from Service Design's customer-facing Service — and governs the one transition that actually carries risk: decommissioning.
- Go to Architecture Catalog → Service Architecture and click "+ New Service".
- Fill in the service type (API, event-driven, batch, shared library or data service), criticality tier, SLA target and team owner, and assign an owning application, capability and domain.
- If this service exposes one or more interfaces already in the API & Integration Catalogue, attach them from the service's detail page — one service can expose both a REST API and an async event stream.
- If a Solution Design depends on this service, link it in as the realized object for the relevant Building Block (Solution Architecture chapter) — that's what makes the service show up in the design's dependency trace rather than just existing in isolation.
- When it's time to decommission, don't just edit the status field — open a Review Request against the service instead. Retiring (not provisioning) is the governed checkpoint here, so it routes through sign-off; approval retires it, rejection reverts it to active.
Take a Strategic Position Paper from framing to funded delivery
Editor roleA Position Paper carries a strategic bet through scope → options → delivery packages → publication, ending with real tracked work in the demand pipeline rather than a document nobody revisits.
- Go to Architecture Catalog → Position Papers, click "+ New Position Paper", and give it a title and executive summary.
- Advance it to Framing: record scope in/out and assumptions, then build the Capability Fit Evaluation grid scoring how well the current estate meets each in-scope capability.
- Advance to Positioning: add candidate Options to the Strategic Options Comparison, define weighted executive criteria (e.g. Strategic Alignment, Transition Complexity), score each option 0–5 per criterion, and capture Transition Propositions as guardrails for whichever direction is chosen. Once a direction is clear, click "Create decision" on the chosen option to formalize it as a governed Architecture Decision — its pros/cons become the decision's rationale, and the paper links back to it automatically; you can also link an existing decision instead via the paper's Linked Artifacts section.
- Advance to Transitioning: break the work into Work Packages sized on the xs–xl cost scale with a complexity rating, and log Consultations as you gather specialist input along the way.
- Move to in_review and request sign-off (or route it through a multi-step Approval Chain for a bigger bet). Approval publishes the paper, bumps its version to the next whole number, and locks it read-only from here.
- Promote a Work Package straight into the Business Engagement demand pipeline to turn the funded initiative into tracked delivery work, carrying its cost tier across as the starting effort estimate. If the direction needs revising after publication, use Supersede to spin up a new linked draft rather than trying to edit the published record.
- Export PDF (available from any stage) generates a formatted report — cover page, colored fit/options tables with a legend, numbered guardrails, work-package and consultation tables, and any linked decisions — rather than a plain text dump; Export .md stays available for a lightweight plain-text copy.
- Once published, any Capability, Application or Technology this paper is linked to shows the paper's Work Packages in a "Planned Work" panel on its own detail page — so opening one of those catalog objects surfaces that there's already agreed work addressing it, without hunting through every position paper that references it. Draft/framing papers don't show up here, only published ones.
Map a customer journey and service blueprint
Editor roleService Design starts from the customer's perspective (the journey map) and then documents how the organisation actually delivers it (the blueprint) — the two together surface where the experience breaks down.
- Create a Persona under Service Design → Personas describing who the journey is for (goals, pain points).
- Create a Journey Map, add phases across the top and rows (e.g. Doing, Thinking, Feeling) down the side, fill in each cell, and set a mood emoji per phase to spot low points at a glance.
- Create a Service (Service Design → Services) that the blueprint will document, then create a Service Blueprint linked to it.
- Add lanes (e.g. Frontstage, Backstage, Supporting Systems, Metrics) and steps across the top, then fill in cells; flag any cell as a ⚠ pain point or a ★ moment of truth as you go.
- Review Quality & Risk → Pain Points and Service Design → Analytics afterwards — pain points aggregate across every blueprint, and Analytics highlights the blueprints with the most flagged pain points and the lowest-mood journey phases.
Triage and prioritise incoming business demand
Editor roleBusiness Engagement turns ad-hoc requests into a managed pipeline with visible priority, ownership and capacity — so nothing gets lost and nothing silently overloads one architect.
- Share your workspace's public request form (the link shown at the top of Business Engagement → Demand Pipeline, format /r/your-workspace-slug) so anyone can submit a request without an account, or log one directly via Business Engagement → Submit a Request.
- On Demand Pipeline, drag new cards through New → Triage → Accepted → In Progress → Delivered/Declined; a stage turning amber means it has exceeded its soft WIP limit.
- Open an engagement to set Value and Effort (1–5) — this places it on the Matrix view's quick-wins/major-projects/fill-ins/hard-slogs quadrants — and to capture the full intake detail (division, sponsor endorsement, objective, problem statement, risk).
- Use the Capacity view to see open demand and total effort per owner before assigning new work to anyone already overloaded.
- Once accepted, use "Promote to roadmap" on the engagement to create a linked Roadmap item, and track the interaction log, stakeholder plan (RACI + support) and eventual CSAT score through to delivery.
Configure single sign-on (SSO)
Admin roleEidon supports SAML 2.0, OpenID Connect/OAuth2 and LDAP/AD. Configure your identity provider, test the connection, then roll users over.
- Go to Settings → SSO and choose your provider type (SAML, OIDC, or LDAP).
- Enter the provider details (for OIDC: issuer/discovery URL, client id and secret; for SAML: the IdP metadata/entity id and certificate).
- Use the built-in "Test connection" to confirm Eidon can reach and authenticate against the provider before enabling it.
- Save the configuration. The login page will now offer the SSO button (or redirect automatically for SAML).
- Keep at least one local admin account working by signing in via the "?local=1" login URL, so a misconfigured IdP can never lock you out.
- Optionally generate a SCIM bearer token (same screen) to let your IdP provision and deprovision users automatically.
Set up rules & notifications
Admin roleAutomation rules watch your catalog and react — creating a risk, notifying someone, or firing a webhook — when conditions match.
- Go to Settings → Rules and create a rule for an entity type (e.g. Applications).
- Add one or more AND/OR conditions, including fields on related entities (e.g. "lifecycle_status is retiring AND business_criticality is critical").
- Choose an action: create a risk record, notify a user, or fire a webhook.
- Choose how it runs — on a schedule, on data change, or manually via "Run now".
- To deliver alerts off-platform, add a channel under Settings → Webhooks (generic JSON, Slack, or Teams) and subscribe it to the relevant categories.
- Users can also self-subscribe to any individual record via its bell toggle to be notified whenever it changes — available to every role.
Export a board-ready report
Any roleEvery report renders a clean, branded, printable view you can save as a PDF to share with executives or auditors.
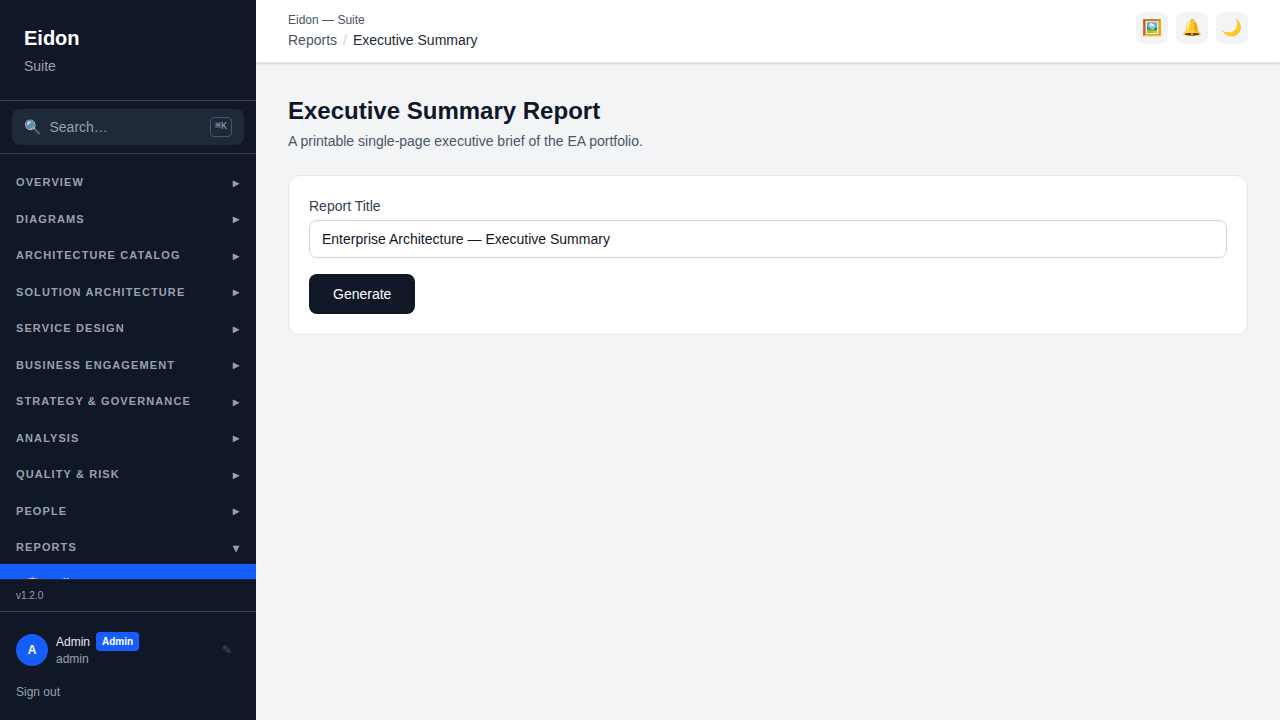
- Open Reports and pick a report — the Executive Summary is the best one-page overview (portfolio, maturity, obsolescence, cost, risk, and security/resilience).
- Give it a custom title, then click Generate to pull the latest data.
- Click "Print / Save as PDF" — the print view is white-labelled with your workspace logo, name and primary colour.
- In the browser print dialog, choose "Save as PDF" as the destination.
- To send reports on a cadence, an admin can configure Settings → Report Subscriptions (weekly/monthly/quarterly email digests; requires SMTP).